Hey everyone, hope you’re having an incredible day today. Today, we’re going to make a distinctive dish, sticky iced buns. One of my favorites food recipes. For mine, I am going to make it a bit unique. This is gonna smell and look delicious.
Sticky Iced Buns is one of the most favored of recent trending meals in the world. It’s enjoyed by millions daily. It is easy, it’s fast, it tastes yummy. They are nice and they look fantastic. Sticky Iced Buns is something which I’ve loved my entire life.
To begin with this recipe, we have to prepare a few ingredients. You can have sticky iced buns using 27 ingredients and 16 steps. Here is how you cook it.
The ingredients needed to make Sticky Iced Buns:
- Prepare mugs any dried Fruit
- Take Earl Grey Teabags
- Get Dessert Spoons Caster Sugar
- Get Mixed Spice
- Take Boiling Water
- Take Vanilla Essence or (I used Vanilla Paste)
- Get The Yeast Mix
- Prepare Lukewarm Water
- Prepare Dried Yeast
- Make ready Castor Sugar
- Prepare The Dough Mix
- Get Strong Bread Flour (plus some for dusting the worktop)
- Get Melted Butter
- Make ready salt
- Prepare Large Egg
- Take Castor Sugar (plus a little for dusting later)
- Prepare Vanilla Essence
- Get Mixed Spice
- Take The Bun Glaze
- Prepare Water
- Get Sugar
- Get Mixed Spuce
- Make ready The Icing
- Take Mug of sieved Icing Sugar
- Take Egg White
- Get warm water (balanced to create the right texture for piping)
- Prepare Glacé Cherries to decorate
Instructions to make Sticky Iced Buns:
- Pre-soaked fruit is key here, so combine the fruit and boiling water etc and mix well, overnight is recommended but I left mine for 5 hours, stirring occasionally, until soft.
- Create your yeast mix, after around 20-30 minutes it will start foaming when it’s ready to use.
- Put the flour into a mixing bowl with all of the dough mix above then add the yeast mix and knead for about 10 minutes, it will become very elasticated and rubbery, It will also look very wet but don’t worry.
- Cover the dough mix with lightly oiled cling film (this prevents it from sticking) and leave the bowl in a warm place like an airing cupboard (I left it on the window sill in the sun). This will prove the dough mix.
- After about 30-45 minutes your dough mix will double in size, put it back to the mixer and knead again for 5 minutes. This really activates the gluten and improves the elasticity and helps create really light buns. Cover and allow to double in size.
- Preheat the oven to 160 degrees (gas mk 5) I put 2 dishes of boiling water in the bottom of the oven to create a combo oven effect which assists the cooking). Drain your fruit in a sieve.
- Make your bun glaze by bringing the ingredients up to the boil then allow to simmer for 5+ minutes until it thickens slightly. Then set to one side.
- Once your dough has doubled in size again, remove it from the bowl and put it onto a well dusted worktop and knead it into a ball.
- Using a rolling pin roll out your dough into a rectangular shape to about 1cm thick all over.
- Evenly sprinkle your soaked fruit over your dough mix leaving about 1 inch on the top edge.
- Roll the dough like a sausage up to the end, brush it with milk and finish the seal.
- Cut the roll into 1 inch sections and turn them on the side to expose the fruit, ensuring you shape them into rounds.
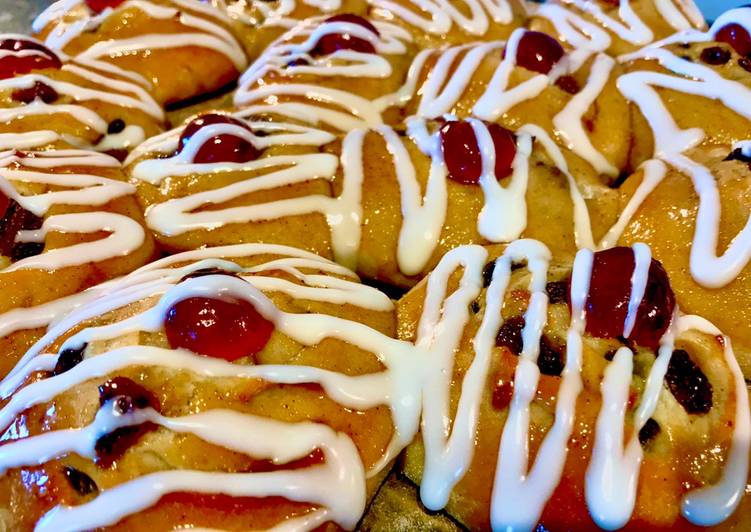
- Place the little buns on a baking tray (I put mine into a round shape like Chelsea buns), put half a glacé Cherry in the middle and cover with cling film and allow to prove in a warm place. I used my grill top as the oven had warmed it up nicely.
- Once the dough has doubled in size pop them into the oven for about 15 minutes until they have gone golden brown.
- Remove from the oven and immediately brush your buns with the glaze you made earlier.
- Place the buns onto a cooling rack. Once cool, sprinkle a little castor sugar to dust the tops, they can then be iced to finish, that’s it, they are ready to eat, as ever, enjoy.
So that is going to wrap this up with this exceptional food sticky iced buns recipe. Thank you very much for your time. I’m confident you can make this at home. There is gonna be more interesting food at home recipes coming up. Don’t forget to bookmark this page on your browser, and share it to your loved ones, colleague and friends. Thanks again for reading. Go on get cooking!